When it comes to creating a resume, one of the most important things to consider is how to line up dates. This is because dates are an essential part of any resume, and they help to provide a clear and concise timeline of your work history. In this article, we will show you how to line up dates on your resume in Word, so that you can create a professional-looking document that will help you stand out from the crowd.
Before we get started, it’s important to note that there are a few different ways to line up dates on your resume in Word. The method that you choose will depend on your personal preferences, as well as the specific requirements of the job that you are applying for. With that in mind, let’s take a look at some of the most common methods for lining up dates on a resume.
Method 1: Using Tables
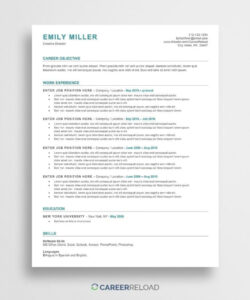
One of the easiest ways to line up dates on your resume in Word is to use tables. To do this, simply create a table with two columns and as many rows as you need. In the left-hand column, you can list the dates of your previous employment, while in the right-hand column, you can list the details of your job responsibilities and achievements. This method is great for creating a clean and organized resume that is easy to read.
Here’s how to create a table in Word:
- Open a new Word document.
- Click on the “Insert” tab in the top menu bar.
- Select “Table” from the drop-down menu.
- Hover your mouse over the grid until you have selected the number of rows and columns that you need.
- Click to insert the table into your document.
Method 2: Using Tabs
Another way to line up dates on your resume in Word is to use tabs. This method is a bit more complicated than using tables, but it can be more flexible and allow for more customization. To use tabs, you will need to create a tab stop for each date that you want to include on your resume. Once you have created the tab stops, you can use the “Tab” key on your keyboard to move between them and enter your job details.
Here’s how to create tab stops in Word:
- Open a new Word document.
- Click on the “Page Layout” tab in the top menu bar.
- Select “Tabs” from the drop-down menu.
- Enter the position of your first tab stop in the “Tab stop position” field.
- Select the type of tab stop that you want to use from the “Alignment” field.
- Click “Set” to create the tab stop.
- Repeat steps 4-6 for each additional tab stop that you want to create.
Frequently Asked Questions
Q: How do I line up dates on my resume?
A: There are a few different ways to line up dates on your resume, including using tables and tabs. The method that you choose will depend on your personal preferences and the specific requirements of the job that you are applying for.
Q: Why is it important to line up dates on my resume?
A: Lining up dates on your resume is important because it helps to provide a clear and concise timeline of your work history. This can make it easier for potential employers to understand your experience and qualifications.
Q: How many times should I include the main keyword in my article?
A: It’s important to include the main keyword “how to line up dates on resume in word” at least 2 times in your article. This will help to ensure that your article is optimized for search engines and will rank well in Google search results.
Q: Can I use other keywords in my article?
A: Yes, you can use other related keywords in your article, as long as they are relevant to the topic and do not detract from the main focus of the article.
Q: How long should my article be?
A: There is no set length for an article, but it’s generally a good idea to aim for at least 1,000 words. This will give you enough space to cover the topic in depth and provide valuable information to your readers.
Q: Is it okay to use a relaxed writing style in my article?
A: Yes, it’s perfectly fine to use a relaxed writing style in your article, as long


